Showing posts with label Body. Show all posts

Saturday 1 May 2021

Handbrake

 Thought this would be easy should have learn by now .using pictures from a trip to GD figured out were the handbrake bracket should be .

taken while on a trip to GD 

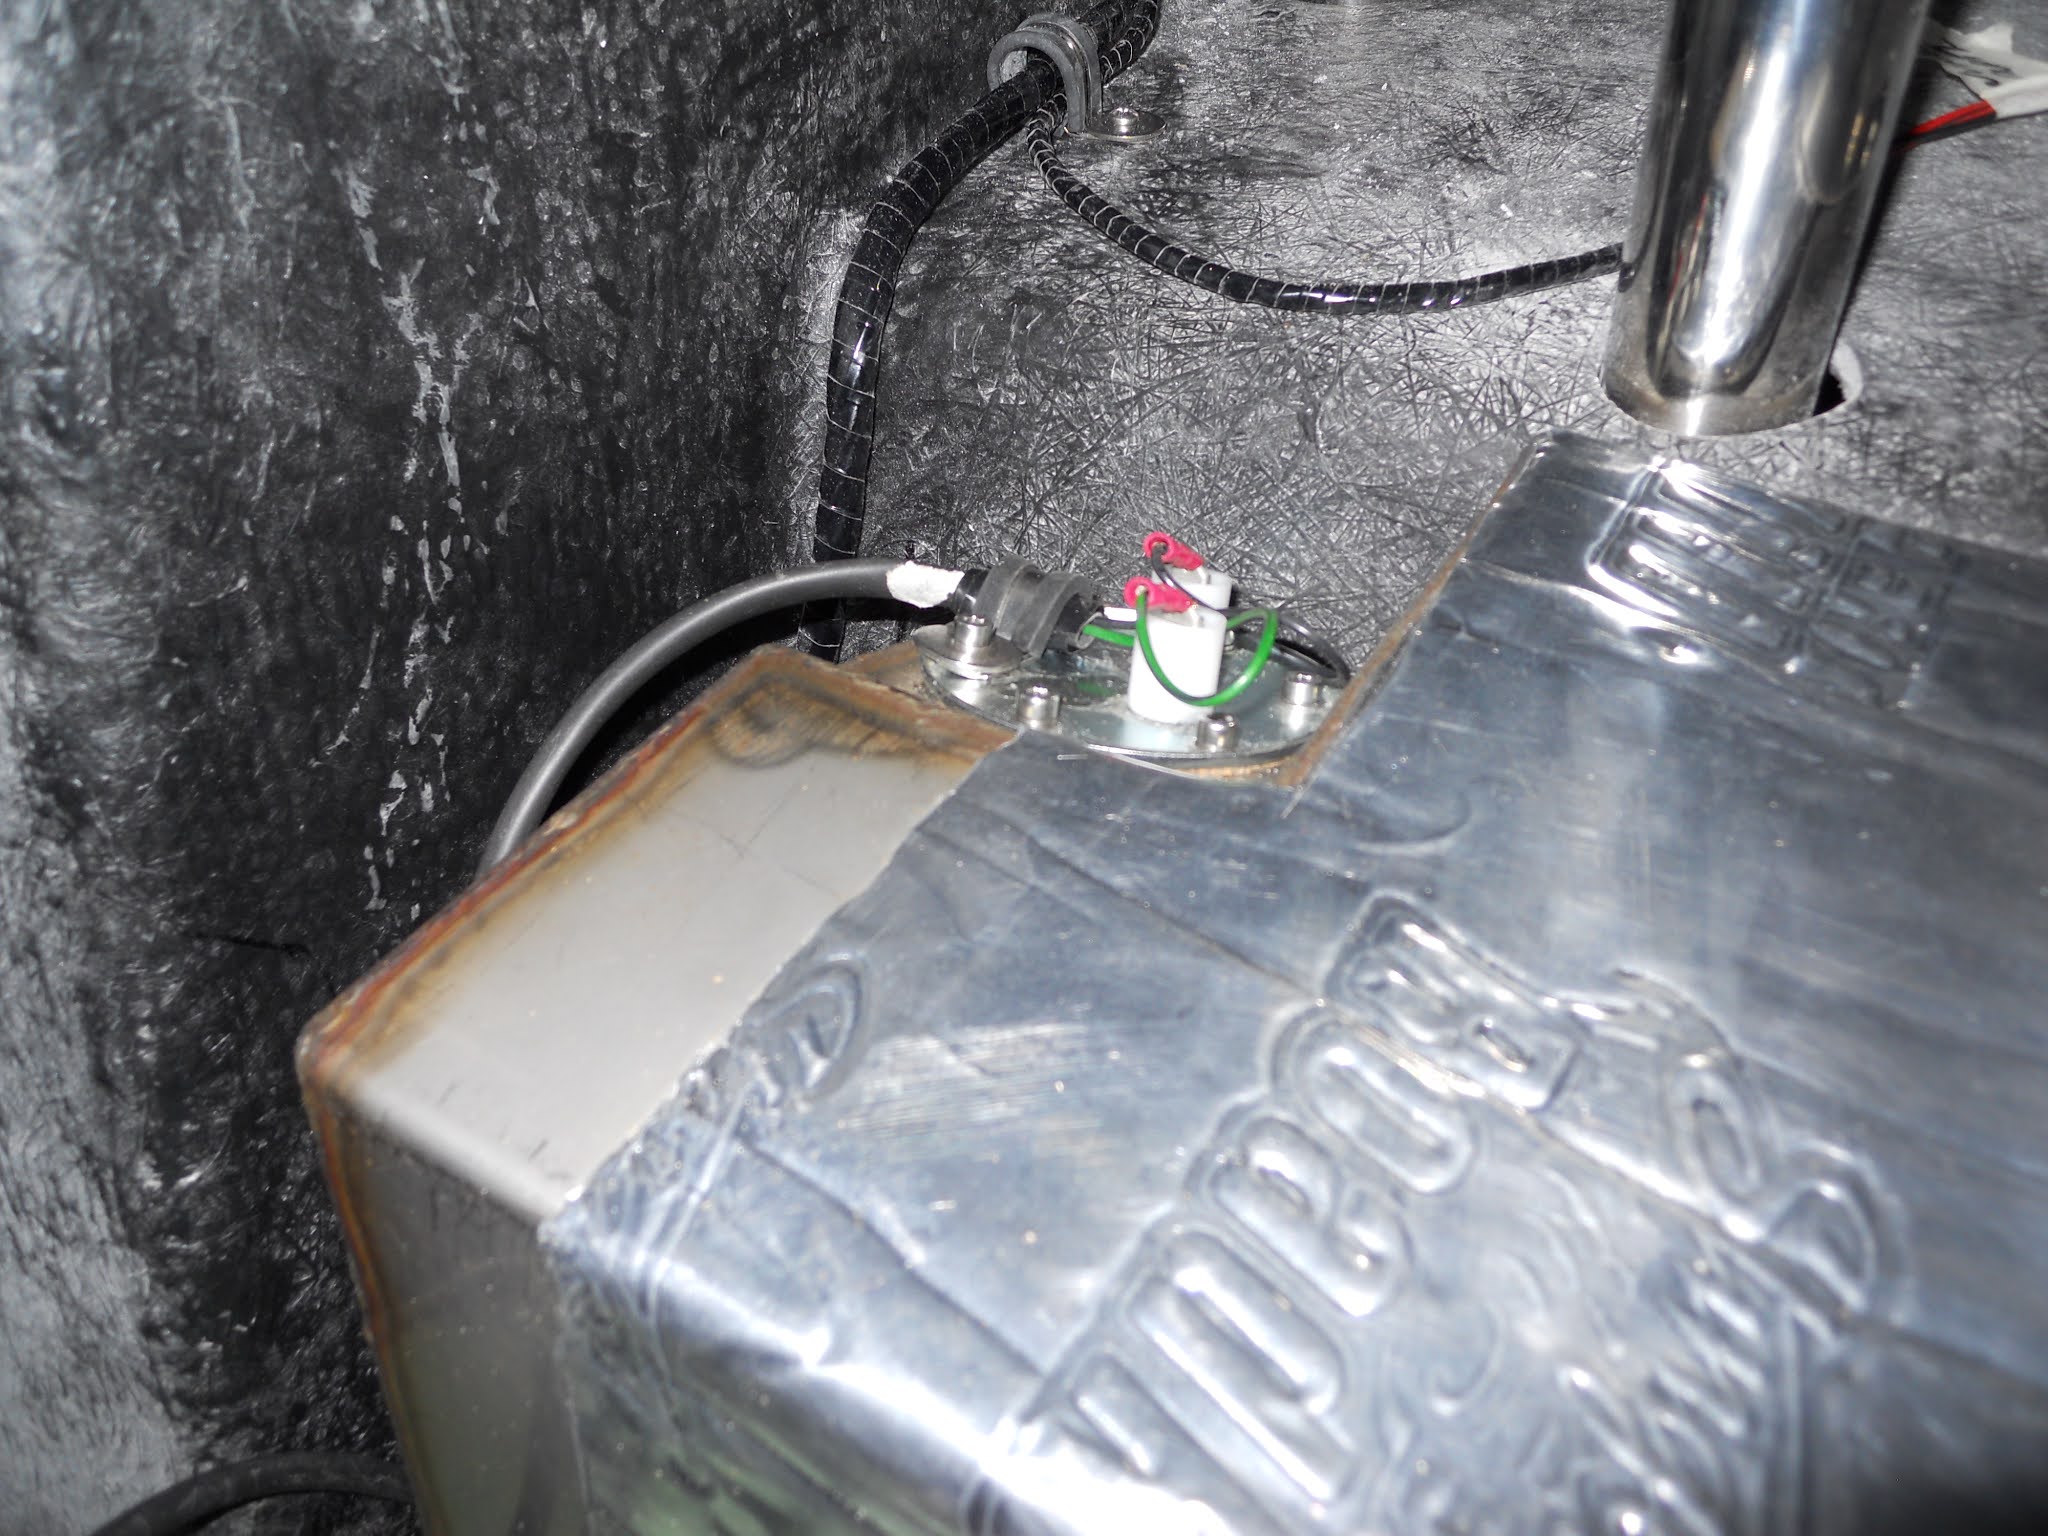
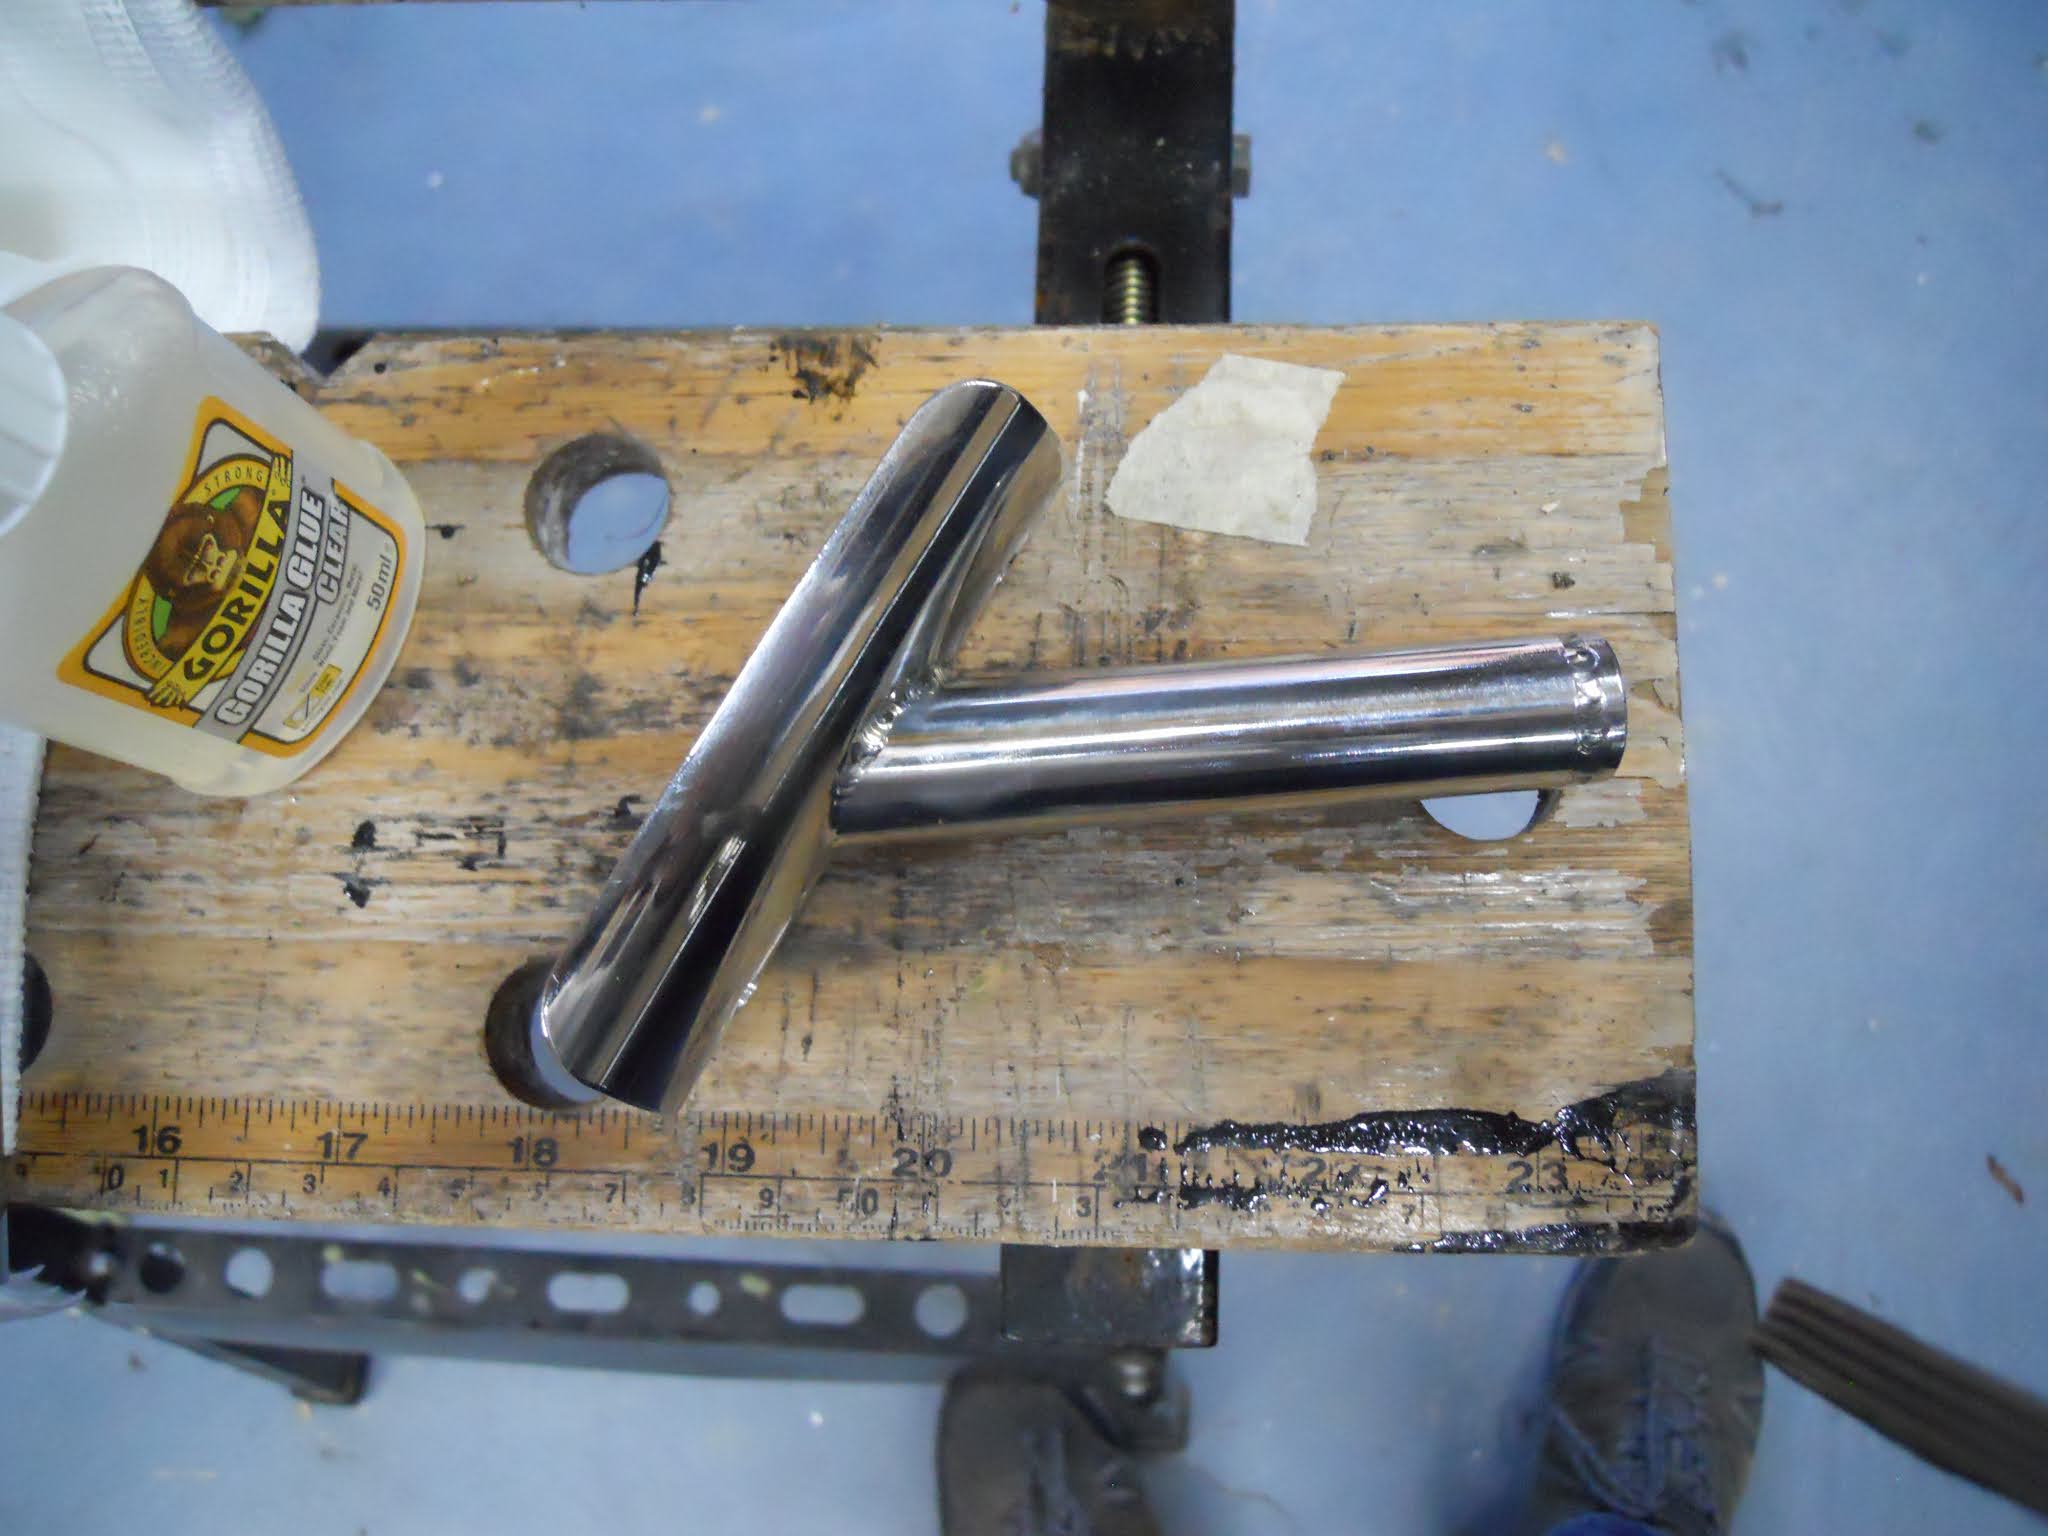
using this we decided to fit the handbrake in the same place ,first drilling a hole in the rear for the cable and then fixing the handbrake bracket. First problem is that the handbrake is that close to the side its impossible to use .initial idea was to bend the handbrake to fit but Steve expert welding services came to the rescue again and the braket was "modified "  

Back stud shortened to give the angle and then the cable retainer had to be moved   

found that it fits a lot better was not sure weather it would go on top or under the carpet and the pics are a bit out of sequence as we settled for on top of the carpet .
Steve happy with his work 
  

Saturday 3 April 2021

Fuel pipes and Wiring

 After refitting the fuel pump after wiring it up was able to fit the pipes on to the tank fittings 

fuel pipes fitted 
The strainer does not have any arrows on it but on one of my camera happy visits to GD i have taken a picture of this and that's' the way Andy fitted it so works for me ,happy with the gland to fit the cable as allows me to "lose" the spare cable in the boot but should I need to take it all down there will be enough slack cable.

Reversing light 

Been putting off fitting the reversing light for some time as marked  it out while the body was on the stand and just wasnt happy that it looked right ,due to the shape of the car so difficult to get datum marks .
Once the boot was on and fitted using the handle gave me another reference so at least it would look right .
measured from each side on the boot handle and each side of the lights and eventually was happy so fitted finally .
Again using the stand offs supplied by Andy I have opted for the lights to have the screws up and down so using the stand off i could use the existing screws just had to extend then with 5mm barrel nuts .
finally happy  looks good 

flushed with success decided to finish the wiring in the boot . The loom naturally goes to the 2 sides of the car and everything is duplicated .My wiring loom had 2 earths each side instead of the 1 shown on the diagram .checked with a meter and they were both good ,so used the Bullet joinerfor 1 earth and brake/tail + indicator and a straight joiner for the other earth and reversing light or fog light .
once the wires were all conected set out to try and tidy it up a bit ,using a p clip to the indicator fixing made it look a lot better ( get covered with carpet anyway .
wiring with p clip and tie wraps


Wednesday 24 March 2021

Fuel tank

 fitted the Fuel tank  and it secures with 2 straps held down with self tapping screws .

Wasn't happy with all that weight  being held with self tappers so used M8 bolts 


Tank secured with 8mm bolts 

 The tank seder has 2 wires needing attached to it so used a 6mm p clip to one of the bolts and connected that 

Tank sender connected 
then on to the fuel pump this has different size connections  presumably so they will only go on one way but i had to crimp the cables so still possible to get it wrong.

the fuel pump nuts dont come with spring washers so replaced those with nylocks  remembering to put the cover on the cable before crimping . smeared with Vaseline and fitted.

fuel pump cables fitted pipes still to sort 

Boot Fitting

 Before the final Fuel tank fit needed to fit the boot first as would be impossible to climb in the boot with the fuel tank in place .

First job was to fit the striker plate .I found the center of the car and marked and drill the plate.


Next job was to fit the boot lid ,I am using the newer type hinges so a bit easir to line up everything with no bending .

Hinges fitted with cap head bolts the same as the bonnet  

Steve graciously volunteered  to climb in the boot to check the position  of the clasp  which should line up as i had the holes drilled in by Andy at GD .

Unfortunately the clasp did not line up at all , the reason was that i had placed the clasp in the middle of the car and it should be 3mm off set ( as mentioned in other blogs so no excuse really ) .

Steve's welding skills to the rescue  again as he moved the catch 3mm so now the catch will line up.

Again in the boot and the catch was fine now .

Secured  the catch with self tapping screws and moved on to the handle.

The handle has 2 locating pegs which have to be drill out to stop it turning 

Marking the locating holes 
Then it was a case of fitting the handle again with self tapping screws .after shorting the bar to the correct length


Steve came up wit the idea for added security to drill and tap the bar so it cant come loose which sounded good to me so drilled and tapped the bar 5mm and secured it to to the latch


latch with the bolt fitted 

Friday 26 February 2021

Throttle cut out

 Once we had fitted the seat it became apparent that the pedal s were to high and driving would be very uncomfortable .pedals out and back like the Hokey Cokey  .

After the final fit there would be no advantage to having the throttle cut out i have previously done . So i have fiberglass the foam back in ,this will make the carpet a bit easier to fit (hopefully )

Foam glassed back in 

Roll Bars part 7

 On to the last bit of roll bar fitting definitely  a 2 man job  and one that again needs to look right ,the holes are pre marked with 3 dimples to aid drilling,


 Had to be aware of were to place the hole in order to be able to get to the back of the bolts .After much deliberation we decided on on hole in the center, so marking bewteen the roll bars to give a centerline drilled the holes trough the rubber and body in one hit .found the easiest way to do this was by using the flex attachment of the dremel with a 3.2mm drill .

bracket in position ready to be drilled 

drilled and bolted down 

thought that was the final fix but not happy with the covers as the machine marks can be seen and not 100% sure that the rubber will seal so going to take them out again to polish and apply some sealant  Part 8 should be the final fix .


Wednesday 9 September 2020

Roll Bars Part 6

 After much debate on what to fill the bars with went for the original idea of foam like everyone else ,Found some high density expanding foam from screwfix ( other brands available !!!) and used that . 

first wet the roll bars and then discovered that the tube is not linked at the weld so needed to fill that bar separately .

Used an extension tube on the foam to make sure we got all the tube filled ,sorry no pics as such a messy job .then put the bolts back in to protect the threads .


Once this had dried is was back in the car again to check the final fit in order to gat the bars to sit parallel had to place 2 washers under the rear bar on the left hand side .

I have opted for the single head rest support which needs to be drilled in the rear downpipe .


using a piece of string we were able to find the mid point so the head rest would look central.
Drilling them was an absolute nightmare ,Tried my cheap drill first unsurprisingly no luck .closely followed by the drills I bought at Stoneleigh again with limited success,then after much abuse from Steve he arrived with his "decent drills" and sorted .


 happy with that but unfortunately managed to scratch the top of the roll bars, so needed to take them out again to be re polished, Huge thank you to John at Alpha circle (Grimsby)  for sorting them out for me ,   

and so 

 its on to fitting the rubber seals and cover plates .

The outside cover plate needs bending to follow the contour of the car and after  much thought bending it round a scaffold tube seems to work the best ( need to remember to bend it first before drilling the 4 mm hole to secure it other wise the ring will kink on the hole. 


bent and ready to be bolted down .

Monday 15 June 2020

Starting Again

Who would have thought that half way though March our world would turn upside down ?Still cant believe it ,
The whole car building process just got put on hold with all the other things going on but now can finally get  a bit of time back on the car .
Fitting the battery seemed to be an easy  next step
Didn't like the bracket idea as less holes in the bulkhead seemed to be the way forward to me  ,trip to the scrap yard and got a battery strap off a car that I think will work fine .
Battery cradle fitted with my strap secured to the back fastening  

Battery fitted  ready for cover plate to go on 

Tuesday 10 March 2020

Throtle Cut out part 2

Needed to tidy the cut out as the carpets will be going in soon.
Seems an absolute age since I cut it out and got told off by Andy at GD for doing so .
So please be warned he does not agree with cutting this out nor is he very happy when he finds out but as I have already done it and got told off I figured I will stick with it
cut out from last year with the 2 throttle body screws
 I removed the pedal gear after we had set the throttle up in order to figure out were the carpet will need cutting. before attempting my first attempt at fibre glassing.
It appears to be like everything else easy when watching someone else but doesn't seem to go as well on the day .
Put the inner skin back in the hole with resin and glass fibre  mat to take up any differences and then glassed in round the edges .
went well considering I was working one handed just waiting for it to go off so I can tidy it up .
pre clean up as still tacky


Tuesday 25 February 2020

DashBoard Part 4 and Bits

Its leather time , Was really dreading this part as it could go wrong very quick and is the focus point to the car .Started by laying the leather at the bottom and making sure that the bottom was going to fit
I glued the bottom in place and let it dry .
Next day came to the rest and started by stretching the leather up which seems to require 3 pairs of hands ,By good fortune had to leave for another task and came across a local furniture upholsterer,the conversation came round to my dash and a asked for any tips ,His reply was amazing ,bring it in and I'll do it for you. So I did and he only charged me beer money .

All my own work !!
   Another couple of little jobs tackled  was to blank off the two unused  ports on the engine .
Jubilee clip added to stop the cap falling off
Spare air box connection
This one I tapped with a 6mm tap and then stud locked a 6mm grub screw .

Also managed to finish off the heater pipes .

just grommets required

Undertray

On a recent visit to GD I noticed that one of the cars had a radiator protector fitted .
I thought it was a good idea so came home with one and the aluminium under tray. 

Ally under tray
the tray  fastens on the same bolts as the radiator so to save taking those out again I slotted the holes    when I came to try it in place it didn't fit (surprise) but because it fits in a tapper it was I case of take a bit off try it take a bit off try it etc .
the radiator protector was a similar story as in the laser cutting it warped and made marking it on to the top radiator bracket a challenge to say the least.


laser cut protector

Once in however it looks well worth the work .


The bottom is secured with 5mm bolts with washers to make up the difference but after twisting my sons arm he applied his lathe skills and made me some spacers !


Ah La Connor (thanks Son )

Monday 27 January 2020

NumberPlate bar

Was told it would be easier to fit this bar before the body went on and then promptly forgot .
Again very difficult to try and get a measurement so opted for  the string between the 2 indicators .


string as a level
and then it was just a case of making it the same distance from the front .
Happy

Saturday 25 January 2020

Bonnet Gas struts

Fitted the bottom bracket in line with the cross member underneath the car as it was an easy way to get them the same distance from the front as finding a place to measure anything is a challenge in itself
Bottom bracket bolted in place

 then I marked were the gas strut would come to on the bonnet in its retracted position added 10mm and that is were I will but the top bracket .
All the marks made sense at the time
 then it was just a simple transfer to drill the top bracket
Fitted

I was told by Andy at GD to put one ram on ad let the gas out until the bonnet just wont stay up and that should be right when I do the same to the other one , but tats for another day


Wednesday 22 January 2020

Horn

I was always going to fit air horns like most other cobra builders but also wanted to be able to use the horn at times with people dying of shock .Guessing that there will be a delay before the air horn starts hit upon the idea of having a smaller horn as well so just a blip would only sound the little one . only time will tell if this works .

Stobel Air horn ready to be fitted

Little horn fitted under the header tank
Plan to put the Air horn relay on one of the 2 spare rivnuts  in the picture

Tuesday 7 January 2020

Radiator and Airbox

the Air box just jams in above the radiator and s held in place with the radiator bracket.
First fitted the air box and secured it in place with the top radiator bracket and found that it rattles which is no good took it down and placed draught excluding foam on the top ( sorry no picture ) and then refitted it with no rattle ..
when I came to fit the radiator I found that the fan housing was catching the air box and wouldn't fit .
solution was to move the air box towards the back of the car as there is a cut out that has to line up with the fan .
At the bottom of the rad I inserted some rubber sheet to make sure that didn't rattle either .

Air box fitted with foam rubber just visible
 

Once the radiator was fasten down could fit the pipework .
rad fan now clears the air box pipework

Sunday 15 December 2019

Roll Bars part 5

Once we had a tap and cleaned the holes out we were good to go to bolt down the bars.
This is no where as easy as it sounds as they want to spring all over ,Found the best way was to fit the inside long bolt first and then using ratchet straps and skill got the other bolts in .
Once fitted there needs to be a clearance hole for the grommet and the posh stainless plate which according to other blogs is 5mm .
Using a 5mm allen key to draw round the bars they were removed again and out came the dremmel to make the holes bigger .

holes now 5mm bigger and bars dropped in
A good day now waiting to fill with foam or something else (not sure yet ) and then grommets and plates .
At least the car can come off the axle stands finally .


Thursday 12 December 2019

Roll bars Part 4

After repeating the process for the other three holes we were ready for a trial fit and shock horror they didn't fit ,
last of the big hole before the trail fit
After 5 mins of panic it transpired that the roll bars were not parallel .Panic over and we needed a way of stretching the bars apart , settled on a trolley  jack which worked quite well
using a trolley jack to make the bars parallel again
after this bit of fettling the bars go in very nicely .
roll bars fitted the wrong way round
Now comes the hardest part ,Drilling the 3rd hole, First issue is that the third leg bolts on to a bracket which can be moved so the stud idea would not work ,next we measured the leg of the roll bar and discovered that it wasn't in the middle  so using triangle theory wont work either  After discussions with Steve as to the best way we settled on placing the roll bar the right way round and balancing it on the top of the body using a sprit level to make sure it was upright in both planes .At this point we would draw round the roll bar to give us an approx  place and then drill a 2mm hole and again used the plumb bob to see were this was in relation to the hole .
Amazingly we were less than 2 mm out ! result so out with the hole saw .

roll bars dropped in the holes
Next came to trying to bolt them down , tried the bolts in the holes (1/2 unf)  and they wouldn't  start , all stop until a tap is sourced .