Saturday 1 May 2021

Bits and Bobs

Bonnet 

 Fitting the Bonnet catches next again measured on a recent trip to GD and using the wiper arms as a reference marked the bonnet and made sure both sides were the same before drilling and fitted with self tapping screws ,The bonnet is double skinned and the handles carry the weight of the bonnet so might change to button head bolts yet .


Handles fitted 

Moving into the engine bay marked a parallel line from the catch and measured down 25mm and that was the first hole for the catch , then made sure that the catch followed the curve of the body ,fastened with button heads.

drivers side fitted 

Moving on to the transmission tunnel needed to fit the gear cover ring again had to be careful not to snag the carpet so went for drilling backwards which seemed to work .

Like button heads better than the usual self tappers 


Fuel Tank 

Needed to fit the fuel flex pipe as not long away from needing fuel .Had already taken the tank to have a earth stud welded on courtesy of  Mirus Engineering So after socking the pipe in hot water to make it forgiving fitted that together with an earth wire from the filler to the tank .
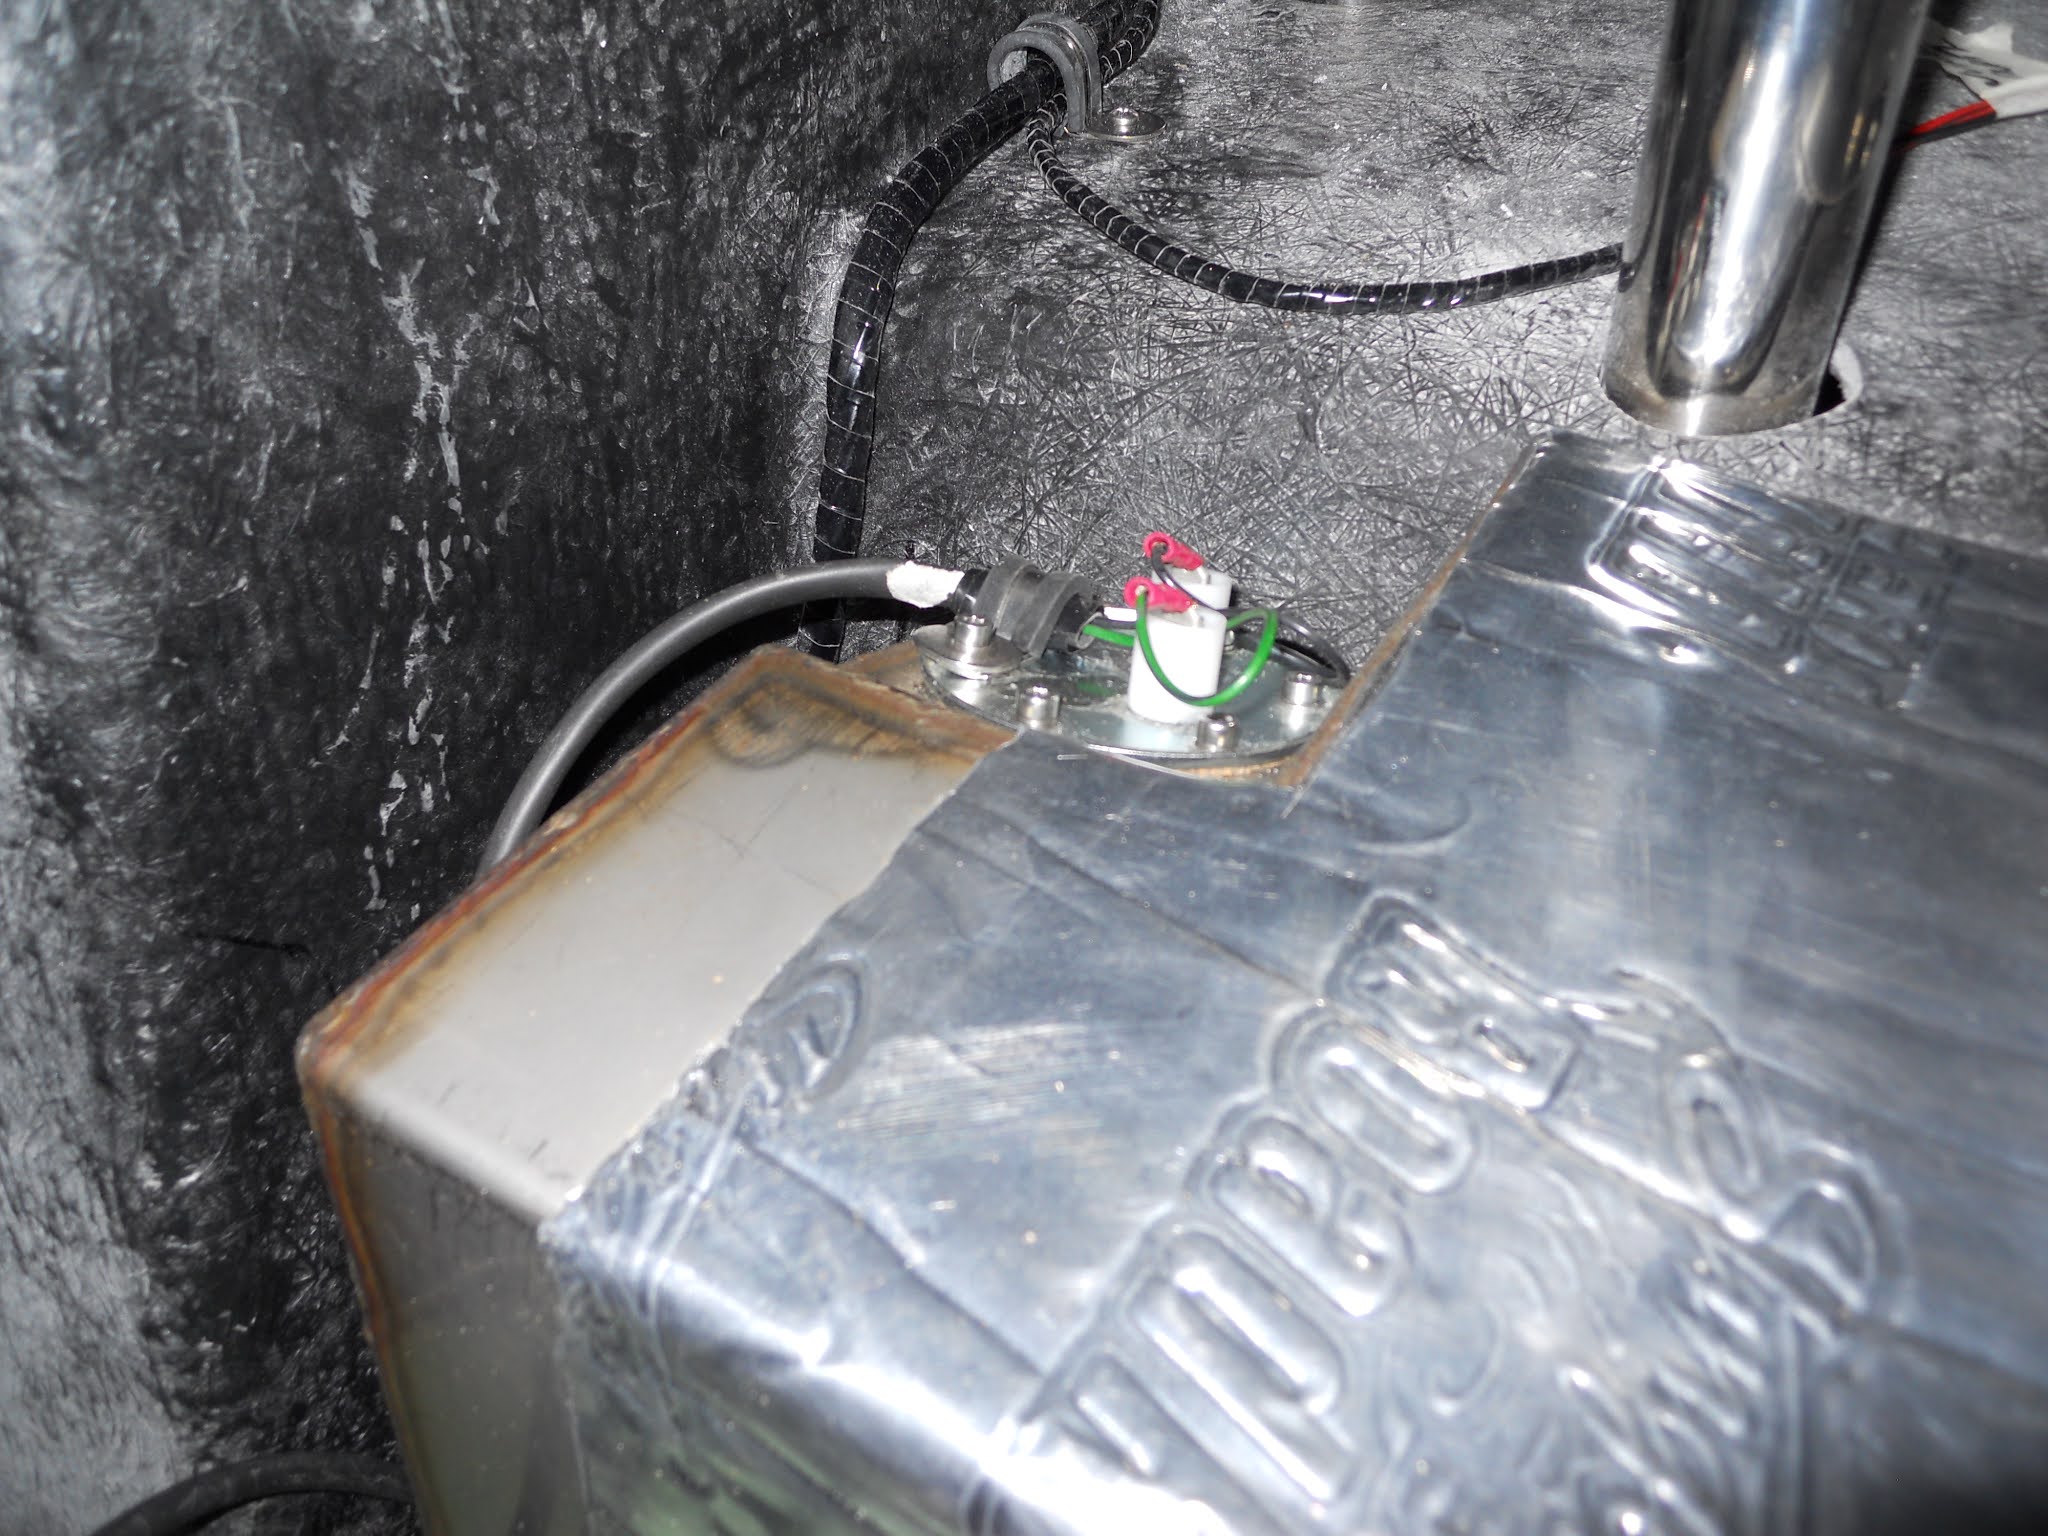
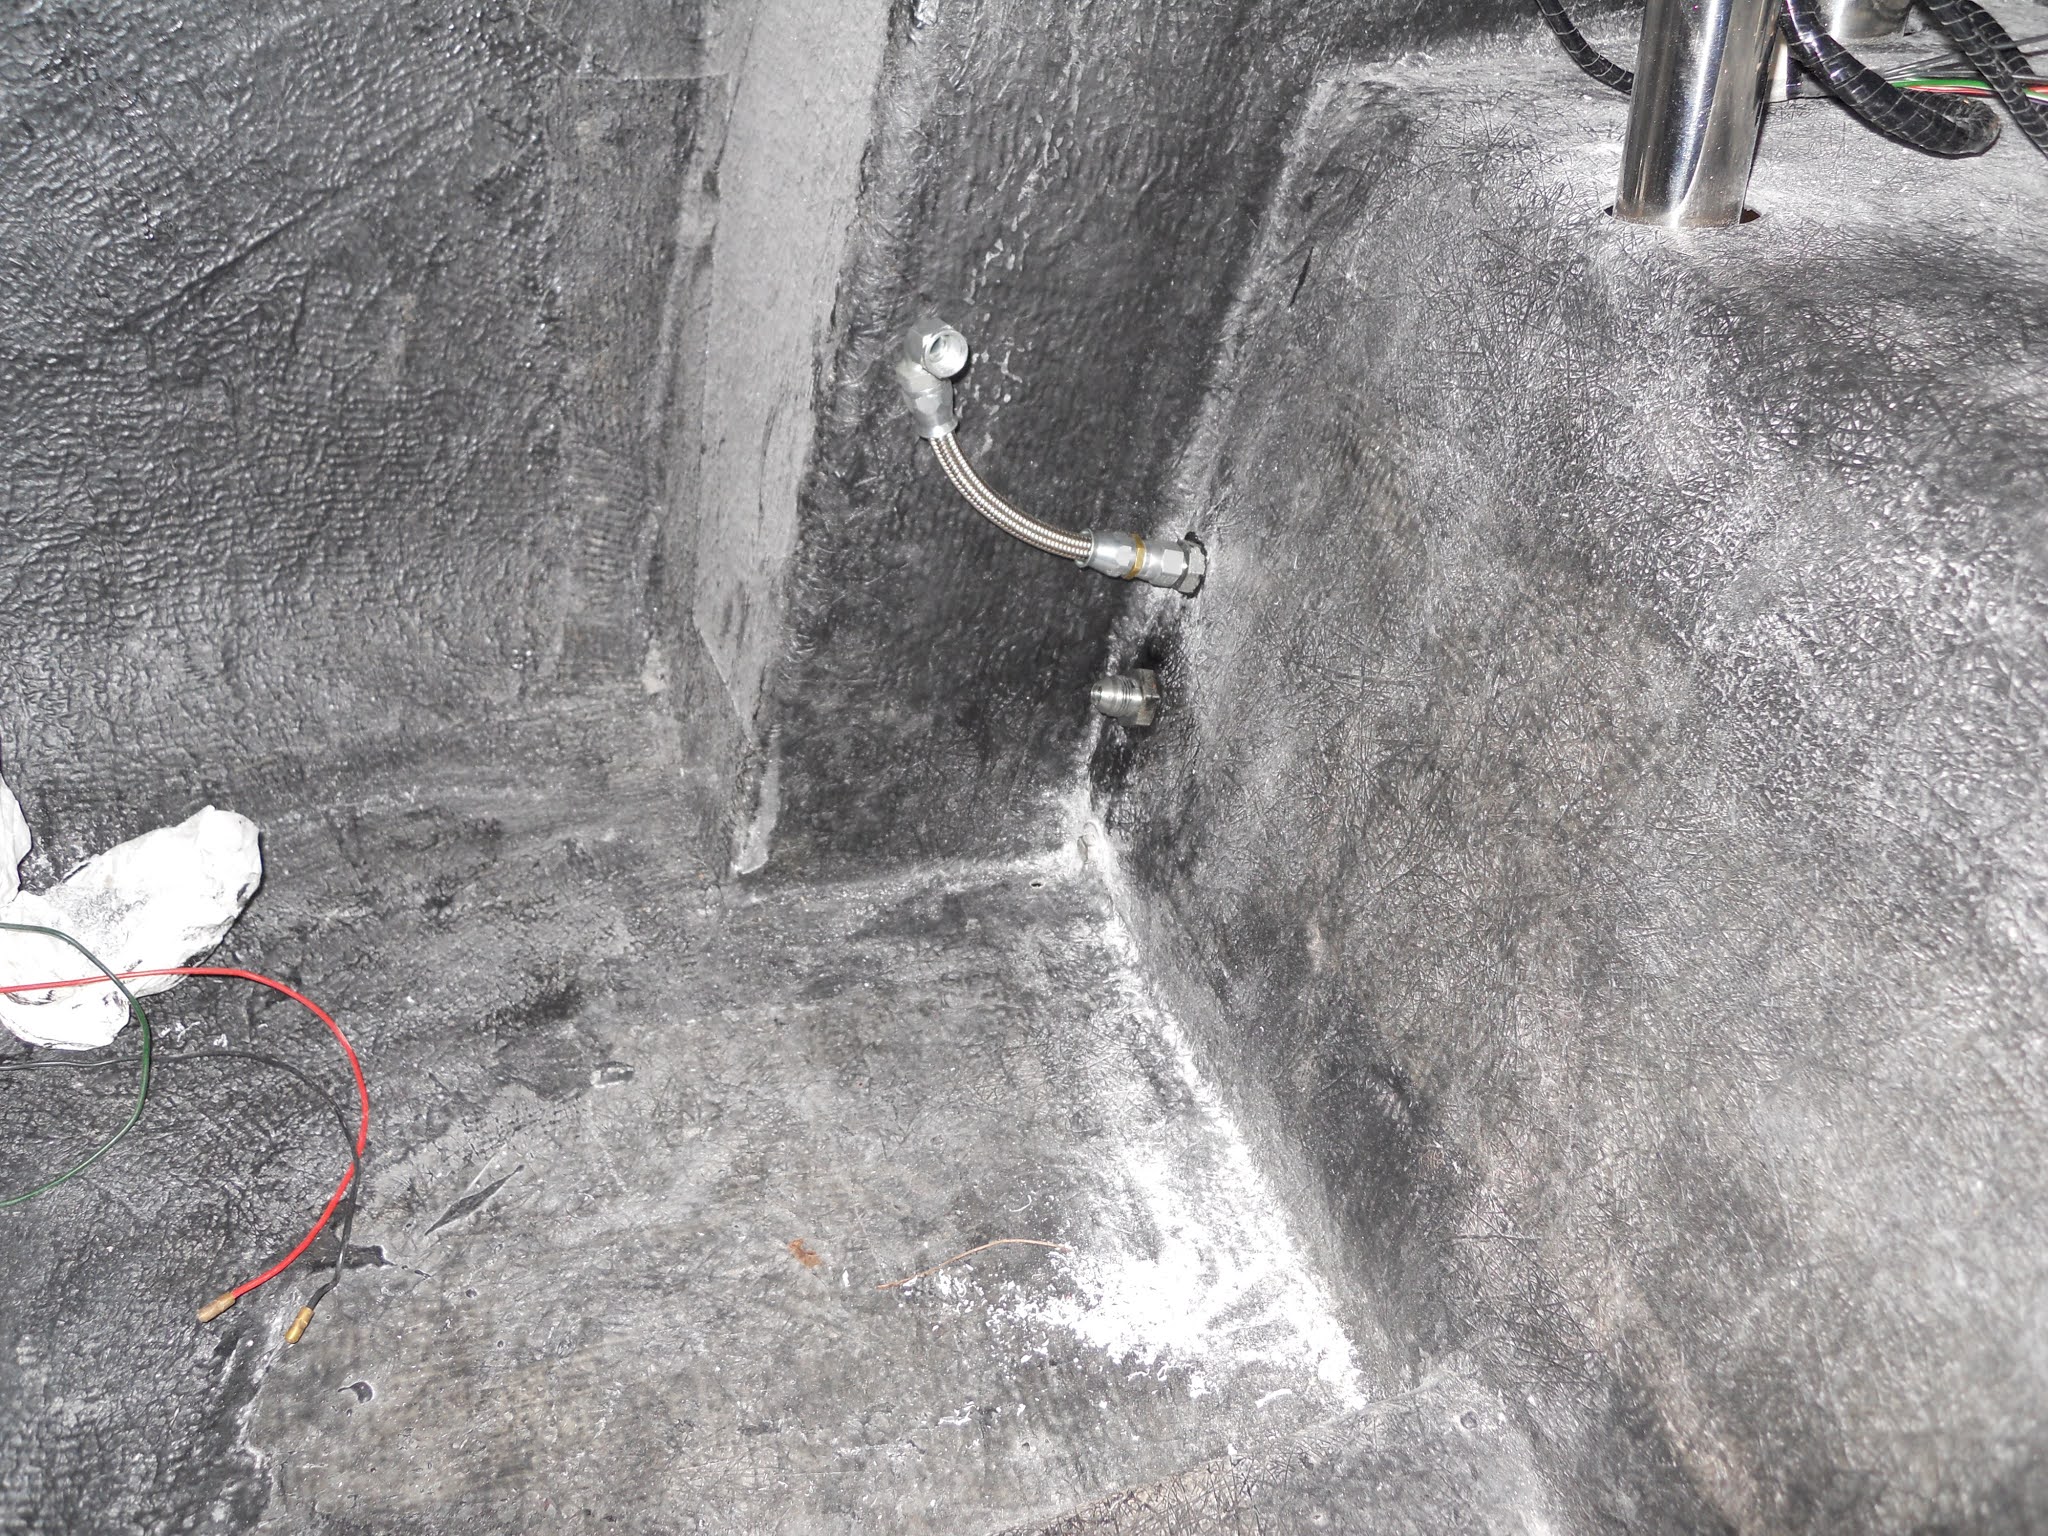
pipe and wire fitted ( thanks Connor ) 

Undertrays 

There are two undertrays that fit under the dash and i know its probably a complete waste of time but i have decided to fit Bluetooth speakers so needed to cut out for this and the reverse lock out button .
Drivers side cut out and sprayed ( both sides because i sprayed the wrong side first )  

Centre tray 

After fitting the center tray  could finally fit the ecu  this was not as easy as i first thought as there is not enough room when the dash is fitted to fit the ecu to the panel .I overcame this by only securing the ecu with the front screws and making sure that it was pushed back as far as it would go . now i have enough room .
ECU fitted


The pink wire hanging down needs to connect to the bared white wire above it as that is the fuel pump supply .

Doors Part 1

 After initially fitting 1 door early on and realizing all it did was get in the way it came off again until now 

The door has an internal handle only which struggles to return on its own so as with other bloggers I attached a spring to the mechanism.

Spring fitted 

 Next job was to fit the door rubber to see if it fitted snug all the way round the door recess and found that it didn't out with the drum sander to smooth out the ridges and good to go .

door seal uniform 

Then its a case of assembling the door which is straight forward and then fitting which is not .After messing about for a while unable to get the door to shut realized that the cap heads holding the door lock were catching swapped those for countersink and getting on a lot better..

Just a case of trial and error moving the hinges about and the door lock in its mountings and then taking it off as not enough room to move the lock etc .

Eventually got the door right with the exception of one bolt that has to be left loose sa will need a spacer under that .

Door fitted (will it still fit with the carpet in ??)


Seatbelts

 Using a four point harness needed the two bottom brackets fitting next .looking at other blogs noticed that I had different brackets to everyone else  as one had a return on it 

Handed brackets that could go in multiple places 

Again using past pictures sorted out were they go and drilled them accordingly 

Applied sealant to the underside of the plate to keep it in place and stop any water rising up 

also had to buy the nuts as none came with the kit and they were 7/16 UNF  ( e bay to the rescue )

drilled and fitted in the correct place 

 Cut the bolt to length ensuring 2 threads showing  after the carpet was refitted 

eye bolts fitted though the carpet ( back carpet laid in ) 

At this point had to see what the harness would look like to fitted it in to see love it .

looking more like a car every day 

Carpet Part 1

 Was dreading fitting the carpets but couldn't go much further without starting  so panicked a bit and bribed Steve with beer and we tacked the transmission tunnel .

Placed the carpet were it need to be at the back and found that this was too far forward for the lay of the carpet to match the transmission tunnel and need to be back about 25mm 

happy with that cut the hole for the gearstick .hovered out all the area and covered the cables with carpet tape

carpet tape on the cables both sides 
Then is was showtime sprayed carpet glue on the transmission tunnel and the carpet and waited for it to just go tacky to give us some working time .

any excuse to get high 

carpet had to come back 25mm 

carpet smoothed out and fits the transmission tunnel 

Fitting the 2 screws that hold the bracket to tunnel were a challenge as didn't want to drill the carpet in case it pulled ended up knocking a 5mm bolt through the hole as a makeshift punch rough i know but worked ,

Handbrake

 Thought this would be easy should have learn by now .using pictures from a trip to GD figured out were the handbrake bracket should be .

taken while on a trip to GD 

using this we decided to fit the handbrake in the same place ,first drilling a hole in the rear for the cable and then fixing the handbrake bracket. First problem is that the handbrake is that close to the side its impossible to use .initial idea was to bend the handbrake to fit but Steve expert welding services came to the rescue again and the braket was "modified "  

Back stud shortened to give the angle and then the cable retainer had to be moved   

found that it fits a lot better was not sure weather it would go on top or under the carpet and the pics are a bit out of sequence as we settled for on top of the carpet .
Steve happy with his work 
  

Saturday 3 April 2021

Fuel pipes and Wiring

 After refitting the fuel pump after wiring it up was able to fit the pipes on to the tank fittings 

fuel pipes fitted 
The strainer does not have any arrows on it but on one of my camera happy visits to GD i have taken a picture of this and that's' the way Andy fitted it so works for me ,happy with the gland to fit the cable as allows me to "lose" the spare cable in the boot but should I need to take it all down there will be enough slack cable.

Reversing light 

Been putting off fitting the reversing light for some time as marked  it out while the body was on the stand and just wasnt happy that it looked right ,due to the shape of the car so difficult to get datum marks .
Once the boot was on and fitted using the handle gave me another reference so at least it would look right .
measured from each side on the boot handle and each side of the lights and eventually was happy so fitted finally .
Again using the stand offs supplied by Andy I have opted for the lights to have the screws up and down so using the stand off i could use the existing screws just had to extend then with 5mm barrel nuts .
finally happy  looks good 

flushed with success decided to finish the wiring in the boot . The loom naturally goes to the 2 sides of the car and everything is duplicated .My wiring loom had 2 earths each side instead of the 1 shown on the diagram .checked with a meter and they were both good ,so used the Bullet joinerfor 1 earth and brake/tail + indicator and a straight joiner for the other earth and reversing light or fog light .
once the wires were all conected set out to try and tidy it up a bit ,using a p clip to the indicator fixing made it look a lot better ( get covered with carpet anyway .
wiring with p clip and tie wraps


Monday 29 March 2021

Dasboard part 8 (final ??)

 Dashboard all done now apart from wiring the speedo and Tacho .

Never  got any wiring with the gauges but downloaded them from the smiths website and then got even more confused as there are 5 wires on the speedo dash  harness and 7 on the plug 

5 wires on harness 

7 wires on the plug 


This resulted in a call to Andy to clarify 

The red/blue goes to the green /orange ,  black/yellow needs to be earthed

and ignore the brown/slate wire and the red wire   the others are straight forward .

Same problem with the Tacho 4 wires on the harness and 6 on the plug 

4 wires 

6 wires on the plug 

again from Andy red/blue wire goes to white/slate on loom 
ignore the brown /slate  and white/black wires..
again the other 3 are straight forward 
As a dissclaimer this was for my smiths instruments and  yours could be different . 


Wednesday 24 March 2021

Fuel tank

 fitted the Fuel tank  and it secures with 2 straps held down with self tapping screws .

Wasn't happy with all that weight  being held with self tappers so used M8 bolts 


Tank secured with 8mm bolts 

 The tank seder has 2 wires needing attached to it so used a 6mm p clip to one of the bolts and connected that 

Tank sender connected 
then on to the fuel pump this has different size connections  presumably so they will only go on one way but i had to crimp the cables so still possible to get it wrong.

the fuel pump nuts dont come with spring washers so replaced those with nylocks  remembering to put the cover on the cable before crimping . smeared with Vaseline and fitted.

fuel pump cables fitted pipes still to sort 

Boot wiring

 Again before the final fit of the fuel tank wanted to secure the boot wiring ,this has to be done with clips no more than 300mm apart .we used p clips and self tapping screw to secure the wire .

The fuel pump wire was the starting point as that goes though a hole between the 2 fuel pipes, i used a 20mm plastic fitting to grip the wire ,my idea was to leave the fuel wires as long as possible so i could fit the fuel pump wires to the pump before fitting it back ( not a lot of room ) and be able to take it down if needed 

fuel pump wires threaded though 

initially i planed to route the cable round the outside edge of the boot but the self tapping screws would be seen , so opted for straight across and protected the wire with so 15mm foam .

amongst the wires are cables for heated screen and boot light which i don't intend to use so will tuck those in the gap at the side of the fuel tank ,apart from the obvious cables that feed the lights there was also a another connection which is the number plate light I plan to take that up the side of the car to the boot hinge ..


Boot Fitting

 Before the final Fuel tank fit needed to fit the boot first as would be impossible to climb in the boot with the fuel tank in place .

First job was to fit the striker plate .I found the center of the car and marked and drill the plate.


Next job was to fit the boot lid ,I am using the newer type hinges so a bit easir to line up everything with no bending .

Hinges fitted with cap head bolts the same as the bonnet  

Steve graciously volunteered  to climb in the boot to check the position  of the clasp  which should line up as i had the holes drilled in by Andy at GD .

Unfortunately the clasp did not line up at all , the reason was that i had placed the clasp in the middle of the car and it should be 3mm off set ( as mentioned in other blogs so no excuse really ) .

Steve's welding skills to the rescue  again as he moved the catch 3mm so now the catch will line up.

Again in the boot and the catch was fine now .

Secured  the catch with self tapping screws and moved on to the handle.

The handle has 2 locating pegs which have to be drill out to stop it turning 

Marking the locating holes 
Then it was a case of fitting the handle again with self tapping screws .after shorting the bar to the correct length


Steve came up wit the idea for added security to drill and tap the bar so it cant come loose which sounded good to me so drilled and tapped the bar 5mm and secured it to to the latch


latch with the bolt fitted 

Friday 5 March 2021

Roll Bars Final fit

 Removed the cover plates as not happy with the machine marks and using Autosol and trusty Dremel now a lot better .

Applied a little bit of silicon to the under side of the rubber and then finally bolted then down .

To finish off put in the eyebolts for the seatbelts and the head rest bars .

Test fitted the eye bolts to see how they would sit and by moving them about managed to get all but 1 to line up ,that one need a bit of carful filing on the roll bar to make it line up .

Once sorted applied stud lock to the eye bolts and the headrest bolts and secured.

Stud lock applied 

Fuel tank

 Today decided to tackle the fuel tank ,wanted to get this in place and all the connections right before removing it to fit the boot as not sure there will be enough room for me and the fuel tank in the boot .

First job was to sound proof it to try and stop it drumming, quite an easy job with the self adessive sheets I bought.

sound proofing applied 

Also following advice from Dale took out the fuel sender and hovered out anything that might be in there to save the filter later on .
Then came the interesting bit ,trying to get the bulkhead fittings in the right place as there is not a lot of room .
2 ideas were forthcoming and as Steve's was the better idea we went with that so ... marked the center line were the pipes naturally wanted to go then removed the tank and bent the pipes to a nice curve before measuring the distance from the bottom of the tank to the center of the pipes this gave us 115mm and 180mm .drilled these holes for the bulkhead fitting ( larger one at the bottom ) 
holes drilled and bulkhead fittings in  
 
Fitted the bulkhead fitting with the long thread to the front to give us more clearance for the pies from the chassis.


then it was a case to see if the tank fitted 
tank in and happy 

Can't put the tank central as not enough clearance for the connections but only 5mm off and it will be covered with carpet .
Next was to see how the pipes will fit on the other side.
answer:- not good ..

the fuel system has the fuel feed from the bottom of the tank which is a straight pipe so no issues there but  the fuel return is an elbow fitting and needs the be at the same angle as the connections so the pipe is not  twisted mine was no were near so fuel pump had to come down and be altered .
fuel pump and filter /pressure regulator 

the fuel feed is the short pipe and the return is the top pipe and the angle is critical .
altered now so the top pipe elbow is 90 deg 

all ready to fit now but going to leave this for another day as wiring the fuel pump will be a lot easier before refitting .


Friday 26 February 2021

Wiring Alterations

 There are some wiring loom alterations that are mentioned on the DVD but not obvious enough for me to have seen before fitting the wiring .

First change is to the horn relay .

The relay has a feed to it and requires an earth impossible to change while its fitted 

Horn relay is the 3rd from the back 

The purple loop need cutting and replacing with an earth .

loop can be seen 

loop replaced with an earth 

Second Change is the  fuel pump feed wire, the wiring is fed from an ignition live from the fuse box and on my car the fuel pump is fed from the ecu so the pump wire has to be cut from the fuse box an attached to the ecu fuel pump wire .

fuel pump wire cut from fuse box 

As this ignition wire is no longer required i intend to use this wire for the feed to the electric seats and the reverse lock out switch .

Third change is to the washer pump again the feed needs removing and replacing with an earth wire 

feed(green wire removed and replaced with an earth