Sunday 28 August 2022

More Fault finding


After the excitement of the start it was time to get   on to the issues found .

I noticed that the fuel gauge reads full and I know there is only 4 gallons in there.

when I took the cables off the sender the gauge went to empty so appears to be a sender problem 

When i looked further the sender is reading wrong should be high resistance when empty and low when full but mine is the other way round

empty should be reading high 
full should be reading low 

One for Andy GD to sort 

Next 

Ignition warning light ---now lights up but still not charging so strip down and see what going on there 

Wipers -- ok changed over the park and now ok but very noisy in operation so might have to bend the tube some more 

Washer -- now working bad earth (my fault)  

Brake fluid light -- now working Lamp blown  

Reverse lock out --ok

Boot lights work with side lights 

and big one for me the start button illumination goes out when engine starts 

Thursday 25 August 2022

First Engine start


Well it was time to try and start the engine, I had pre lubed the engine a while ago and Andy from GD recommended unclipping the coil packs and turning the engine over to get the oil circulating ( i have running in oil in so it's like water ) 
Did this and all seemed well so then went for a start  the live video footage is below please note: - There is swearing, and bad dancing involved!!


Can't believe it started first time so pleased.

Had a few issues which will need to be looked at 
1:fuel gauge reads full all the time 
2: oil temp gauge not reading 
3: water leak coming from the header tank area 

Plus the other electrical issues mentioned before but all in all a good day 
Steve came round to see the car and we did another video which doesn't have me acting like a child which is below 


Friday 19 August 2022

Fault finding

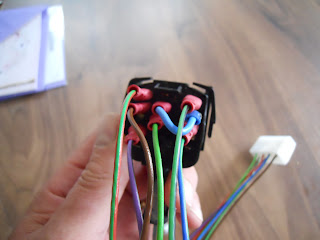
 After a disastrous day yesterday thought i would start at one problem at a time so, started with the Headlights, using GD dash wiring i traced everything out and found that were the stalks plug into the wires have been fitted wrong !!Know that not Andys fault as he sources the wiring out but it took me most of the day to sort it ( and a few very choice words)

similar blue wires in the wrong plugs 

Now it all makes a bit more sense and checks out with my meter .

so now time for next power up . 

- Side lights --ok 

-Dip lights -- ok 

Main beam --ok ( and indicator works ) 

Flash --ok

Gauge back lights --ok 

Fog light --ok ( only when head lights on and indicator works

- heater both speeds --ok ( i wired the switch backwards so always working on speed 2  duh) 

Reversing light -- ok 

indicators lhs plus repeaters   - ok 

Indicators rhs plus repeaters   - ok  

Hazards   - ok 

horn -- soft tone only -- ok ( loud disconnected as in the garage) update bloody hell that loud 

Ignition warning light --- NO 

Start button lights up -  ok 

fuel pump runs then stops   - ok 

Wipers -- ok (parking on wrong side ) 

Washer -- NO 

Brake fluid light -- NO 

Reverse lock out --ok

Brake lights --ok 


So a lot better just a few bits to look at before a start 


Thursday 18 August 2022

powering up ( and down again)

 Time to power up 

so connected the dash up put all the fuses in and connected the battery no bang or smoke which is a good start .

first check was 

heater --only works on one speed

side lights -- all work 

head lights - no  no full beam  but flash works 

wipers -no on first speed then on second works but head lights come on !!! 

no point carrying on so enough for today out with wiring diagram.


Dash Wiring Stalks

 Final part of the wiring quite easy once i had marked cables and photocopied the supplyed drawing to make it bigger for old eyes !

Son in law came round so gave him the job 

All done thanks Adam 

Decided to alter the wiring slightly as not having intermittent wiper so moed the wiring so

 intermittent is now speed 1 and speed 1 is now speed 2 ,i also had to link speed 2 to speed 1 other wise when i went to speed 2 the wiper would stop .

link wire added 

Boot Carpet

 Went on to something easy after the exhaust .boot carpet seems straight forward  4 side pieces  2 bottom bits and a back bit .

As i was fitting the carpet i remembered that i have earthed the tank to the filler but then thought the tank is sat in a fiberglass shell and completely isolated ! Decided  to run an extra earth wire though the roll bar gap and secure it to an earth .

Earth wire from tank going down 

Carpet fitting was straight forward started with sides.
one side on 

then the bottom ,I appear to be luckier than other bloggers as my carpet already had the cut outs for the roll bars and the carpet was already fitted with velcro to secure it back after fitting .
bottom fitted 

the only fiddly bit was once the last piece was fitted needed to refit the boot catch and that traps the carpet ,very carefully drilled up to make holes in the carpet and then temp helf in place with an allen key until i got the bolts in .
All fitted 

Exhaust (Hokey Cokey) o

After much deliberation  still couldn't get the exhaust to fit always seemed to be the left side sticks out more than the right 

nearside sticking out 

After measuring everything found that the only difference was the  pipe marked nearside was 37mm longer than the drivers side.

After  a call to Andy he told me this is for the off set of the "V" engine (which makes sense) but should only be 20mm !

This all started to fit in to place now as when i fitted the pipes one of the pipes stuck though the rear mounting 18mm more than the other one .

Confident i cut off 17mm off the pipe at the cat end ( didnt want to touch the other end as there is a kick welded into the pipe .

pipe marked with masking tape to get level cut 

Now it all fitted and was level  my next issue was the drivers side was further out than the other  resolved this by notching the back plate to allow me to slide the exhaust over 


Driver side notched to slide over 

Finally all fits and level  just need to witness mark it all and then take it down once again to apply exhaust sealing paste but that's for another day.